System Requirements for Windows 11 Professional N
Before installing Windows 11 Professional N , make sure your PC meets the following minimum requirements:
| Component | Requirement |
|---|---|
| Processor | 1 GHz or faster, with 2 or more cores on a compatible 64-bit processor or System on a Chip (SoC) |
| RAM | Minimum 4 GB |
| Storage | At least 64 GB of available storage |
| System Firmware | Must support UEFI and be Secure Boot capable |
| TPM (Security) | Trusted Platform Module (TPM) version 2.0 |
| Graphics Card | Compatible with DirectX 12 or later with WDDM 2.0 driver |
| Display | High-definition (720p) display, minimum 9” screen, 8 bits per color channel |
| Internet | Required for downloading and activation |
Additional Notes:
- You can check if your PC meets the requirements using Microsoft’s PC Health Check tool.
- If your device does not support TPM 2.0 or Secure Boot, you may need to enable them in the BIOS settings.
- Windows 11 cannot be installed on 32-bit systems.
How to Download Windows 11 N Professional
Download Directly from Microsoft:
Go to Microsoft’s official website:
https://www.microsoft.com/en-us/software-download/windows11
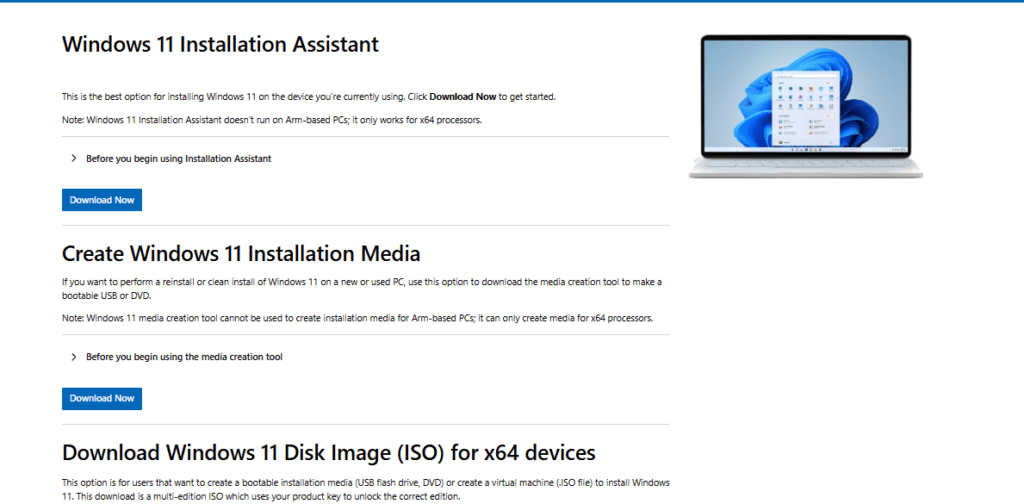
Scroll to “Create Windows 11 Installation Media”
Under this section, click on Download now.

Double-click the downloaded file.
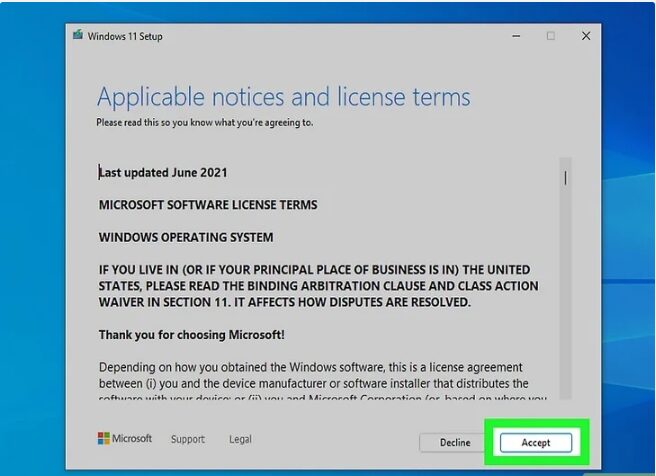
Click Accept to accept the license.

Choose your preferred language and edition.
Choose an installation type and click Next.
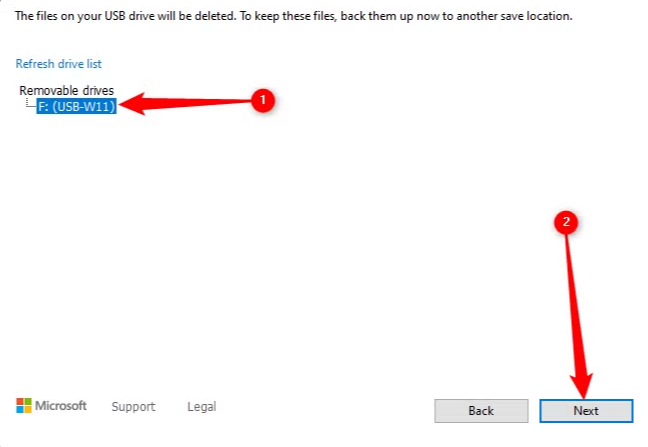
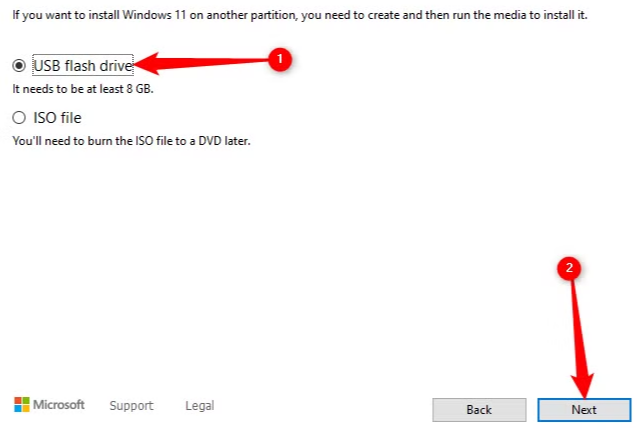
USB Flash Drive: Select your drive, click Next, and wait for the process to finish. DVD/ISO File: Save the ISO to your PC. Once downloaded, open the DVD burner, select your drive, and click Burn

Booting from Windows 11 Installation Media
Creating an Installation Disc or Drive
Use a tool like Rufus to create a bootable USB drive from the downloaded ISO file.
If you need help creating a bootable USB, you can follow this guide: https://kymakers.com/how-to-create-a-bootable-usb-flash-drive-to-install-windows/
With the boot media ready, we can now proceed to the installation steps. Windows 10 Professional allows you to install the following editions:
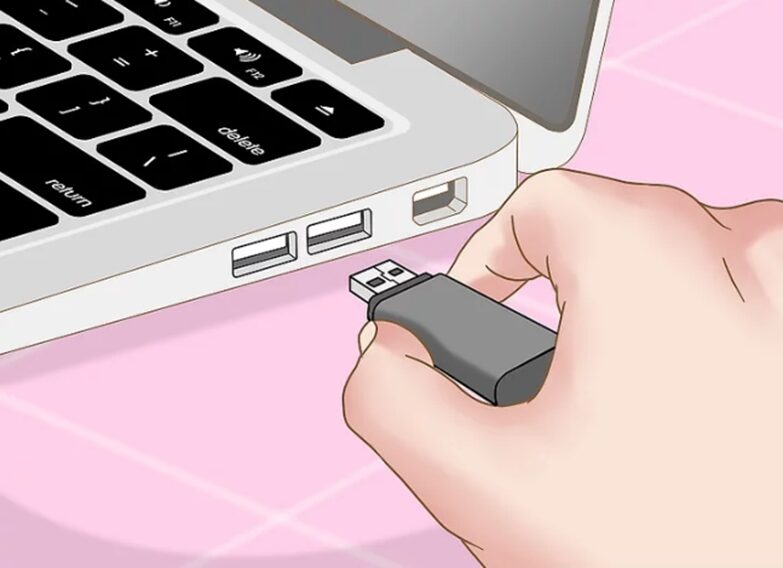
Insert the bootable USB into your server hardware and boot it.
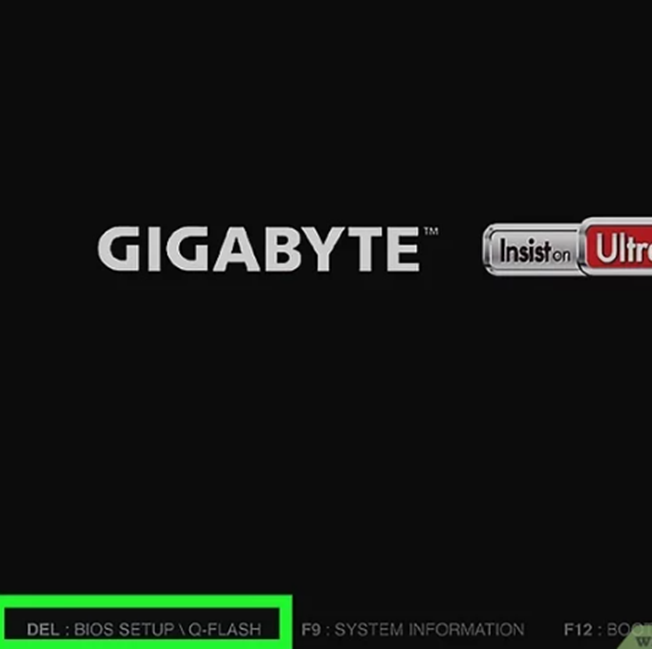
Boot into BIOS to change boot order. Press the right key at startup (e.g., F2, DEL, ESC, F12) depending on your PC brand.
Go to the Boot tab. You’ll use the arrow keys to select it.
- The Boot tab may instead say Boot Options or Boot Order, depending on your computer’s manufacturer.
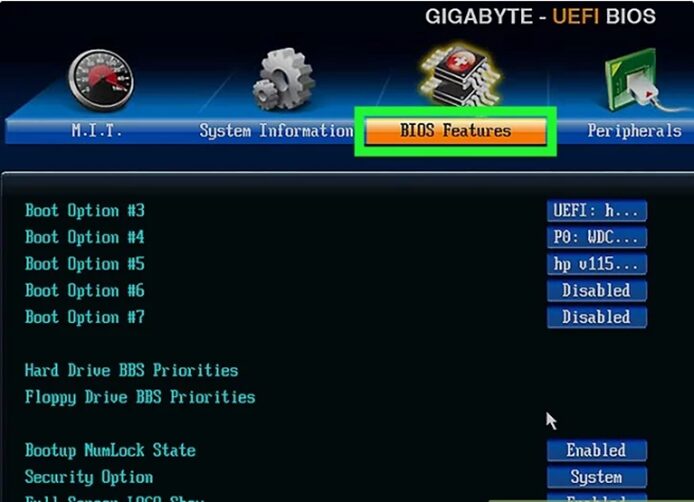
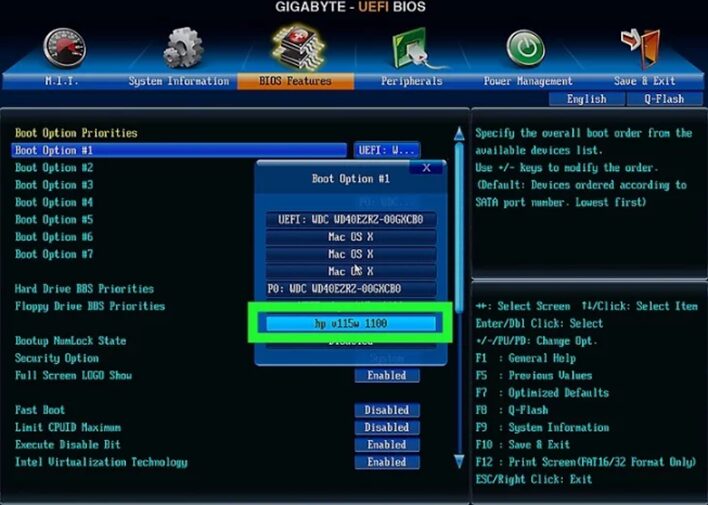
Select a device from which to boot. You have a couple of options here:
- For a USB flash drive, select the Removable Devices option.
- For a disc installation, select the CD-ROM Drive or Optical Drive option.

Press the + key until your boot option is first. Once either Removable Devices or CD-ROM Drive is at the top of the list, your computer will select your choice as its default boot option.
- On some computers, you’ll instead press one of the function keys (e.g., F5 or the arrow keys to navigate an option up to the top of the menu. The key will be listed on the right side of the screen.
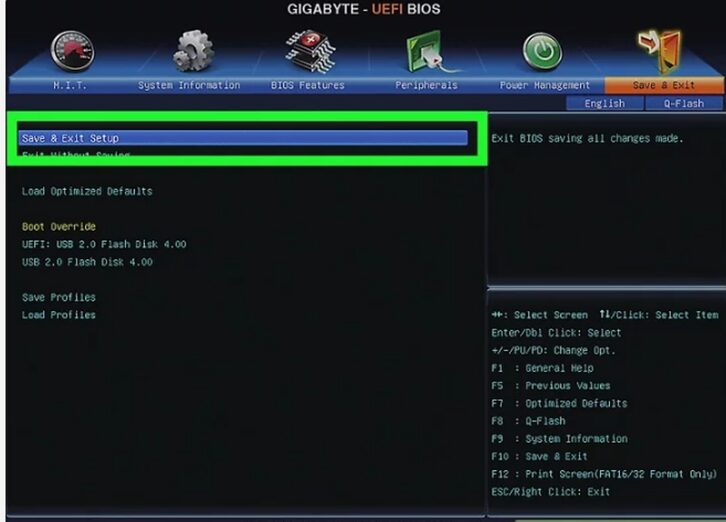
Save your settings. You should see a key prompt (e.g., F10 at the bottom of the screen that correlates to “Save and Exit”. Pressing it will save your settings and restart your computer
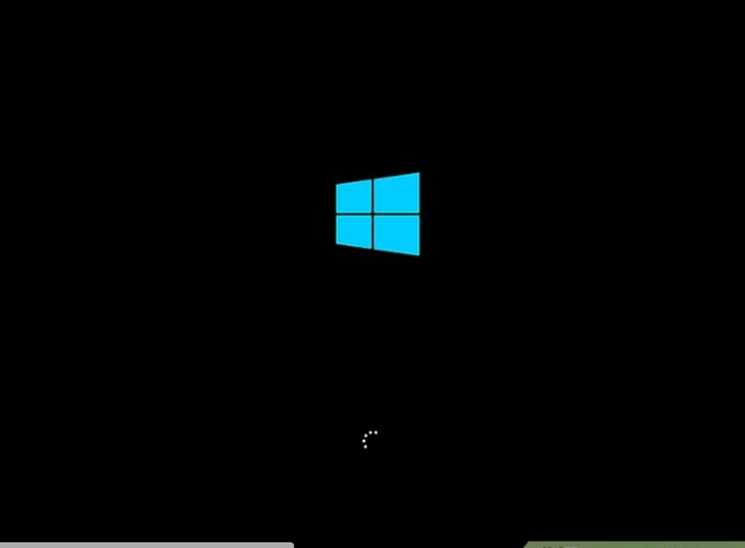
Wait for your computer to restart. Once your computer finishes restarting, you’ll see a window here with your geographical data. You’re now ready to begin setting up your Windows 11 installation
Installing Windows 11
Press any key to continue.
Choose the installation language and format.
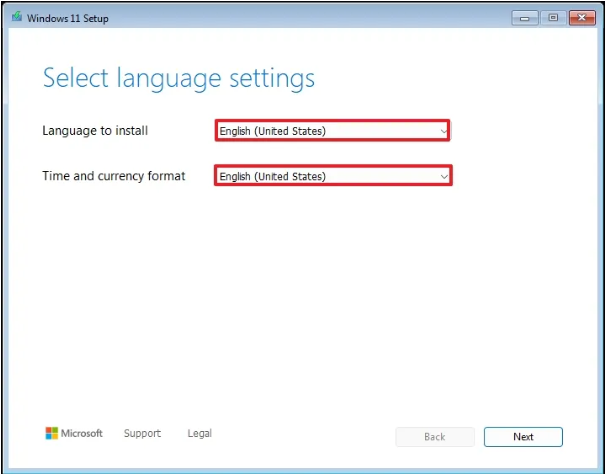
Click the Next button.
Choose the keyboard and input method.
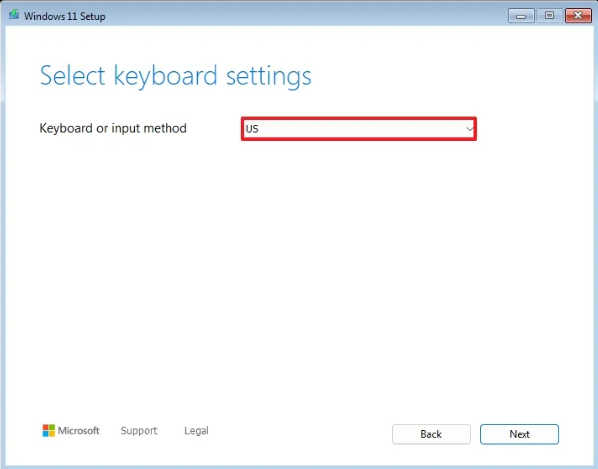
Click the Next button.
Select the “Install Windows 11” option.
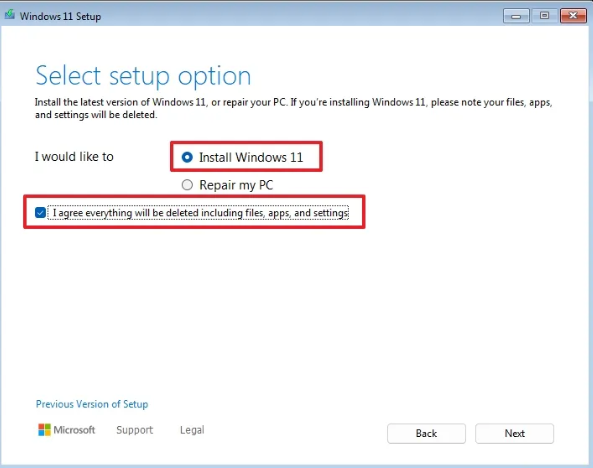
Check the “I agree everything will be deleted including files, apps, and settings” option to confirm this process will delete everything on the computer.
Click the Next button.
Click the “I don’t have a product key” option.
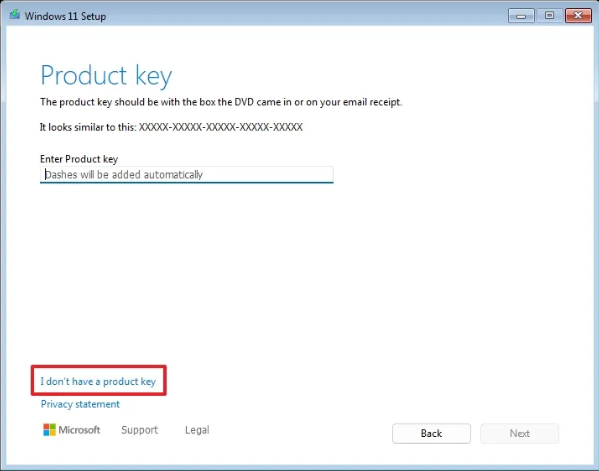
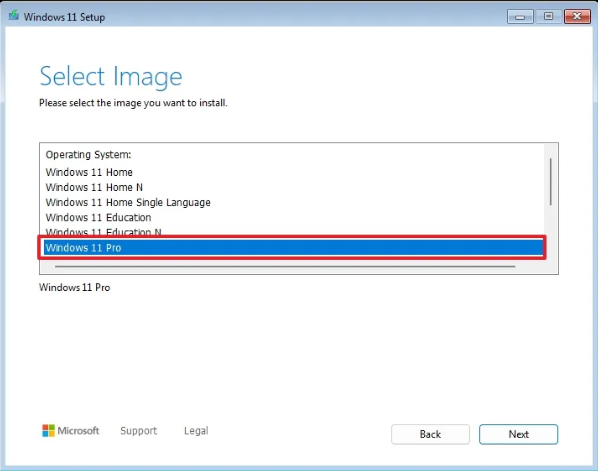
Please make sure to select Windows 11 Pro N during installation, as this is the version your license key activates. Selecting the wrong version may cause activation to fail.
Click the Next button.
Click the Accept button
Select each partition on the hard drive where you want to install Windows 11 and click the Delete button. (Usually, “Drive 0” is the drive that contains all the installation files.)
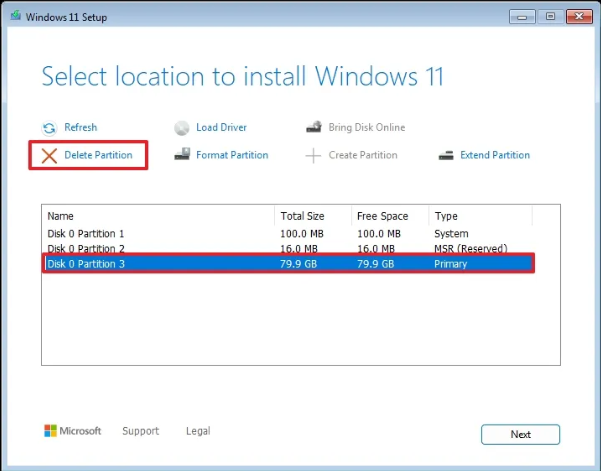
Select the hard drive (Drive 0 Unallocated Space) to install the operating system.

Click the Next button.
Click the Install button.
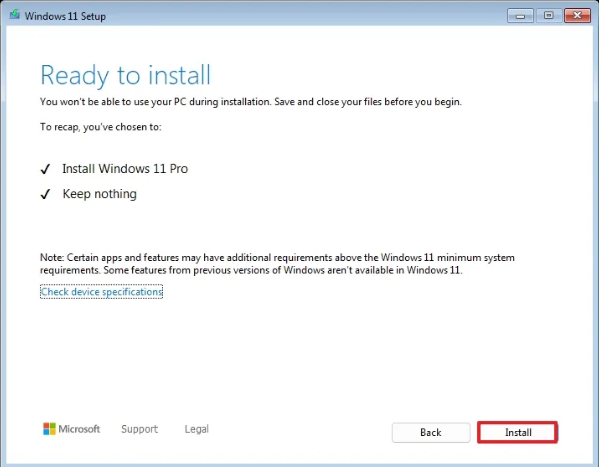
Once you complete the steps, Windows 11 24H2 will finish the clean installation on the computer.
Activating Windows 11 Professional N
Once installation is complete, go to Settings > System > Activation.
Click the Change button in the “Change product key” setting.
Type the 25-digit activation product key for the edition of Windows 11.
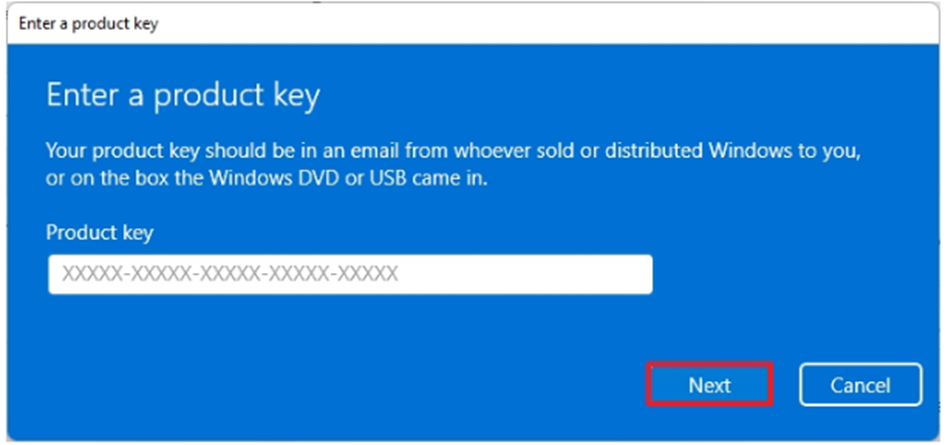
Click the Next button.
Get Your Genuine Windows 11 Professional N License Today!
To enjoy the full power of Windows 11 Professional N , you need a legitimate license key. We offer affordable, 100% genuine Windows 11 Professional N licenses that are easy to purchase and activate.
Buy Your Windows 11 Professional N License Now
Don’t risk using counterfeit or unauthorized keys. Get yours today, and upgrade with confidence!