System Requirements for Windows Server 2019 Standard
Windows Server 2019 Standard is a robust and scalable server operating system designed to meet the needs of small to medium-sized businesses. It provides essential features for virtualization, enhanced security, and seamless integration with hybrid cloud environments. Before installation, ensure your server hardware meets the minimum system requirements to guarantee stable, secure, and efficient performance.
| Requirement | Details |
|---|---|
| Processor | 1.4 GHz 64-bit processor, 2 cores minimum |
| RAM | 2 GB minimum (4 GB or more recommended for optimal performance) |
| Disk Space | Minimum 32 GB free (more required if system has RAM of 16 GB or more) |
| Network Adapter | Ethernet adapter capable of at least 1 Gbps |
| Firmware | UEFI-based system with Secure Boot capability (optional, but recommended) |
| Operating System | Clean install or upgrade from Windows Server 2016 or supported versions |
How to Download Windows Server 2019 Standard
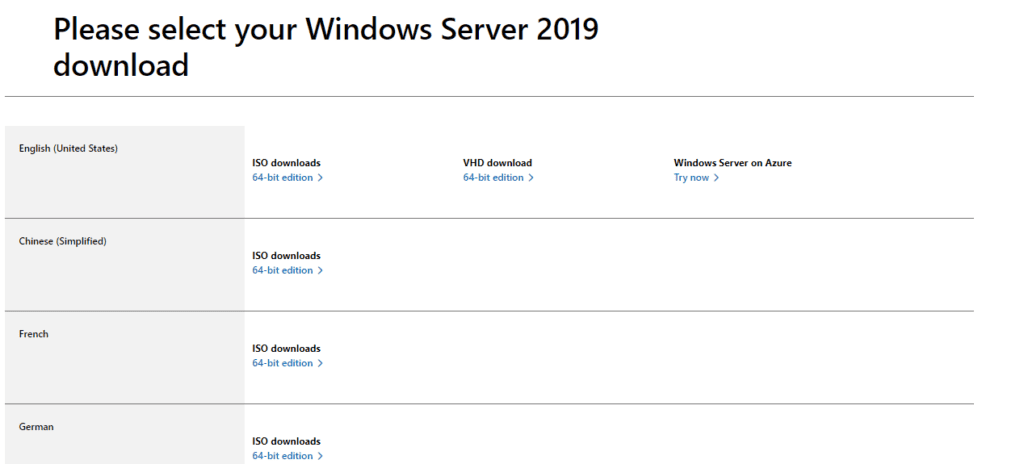
You can download the official Windows Server 2019 Datacenter ISO directly from Microsoft here:
Windows Server 2019 | Microsoft Evaluation Center
Choose the language you need and click the 64-bit edition link.
Choose a location on your disk to save the Windows Server 2019 Essentials ISO image.
Then, it will start to download it and you just need to wait patiently. It depends on your Internet speed.
How to Install Windows Server 2019 Standard
Booting from Windows server Installation Media
Need help booting from USB? You can follow the step-by-step instructions in this guide: https://kymakers.com/booting-from-windows-10-11-installation-media/
With the boot media ready, we can now proceed to the installation steps to install Windows Server 2019 Datacenter
Install Windows Server 2019 Standard
On the first screen, select installation language, Time and keyboard layout the
click “Next“.

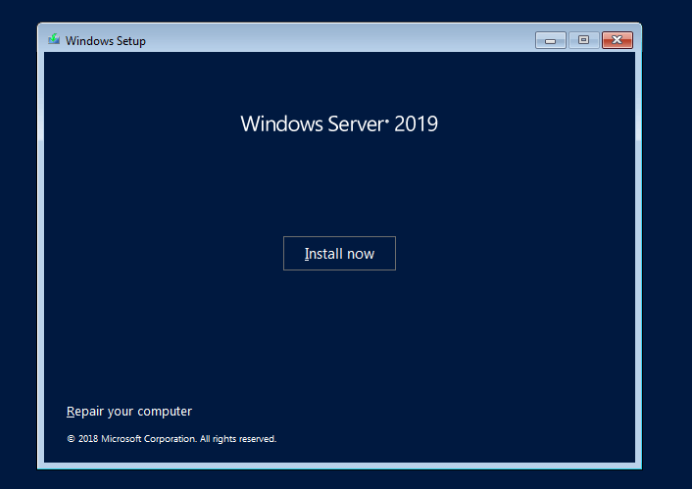
Start the installation by clicking on “Install Now“.
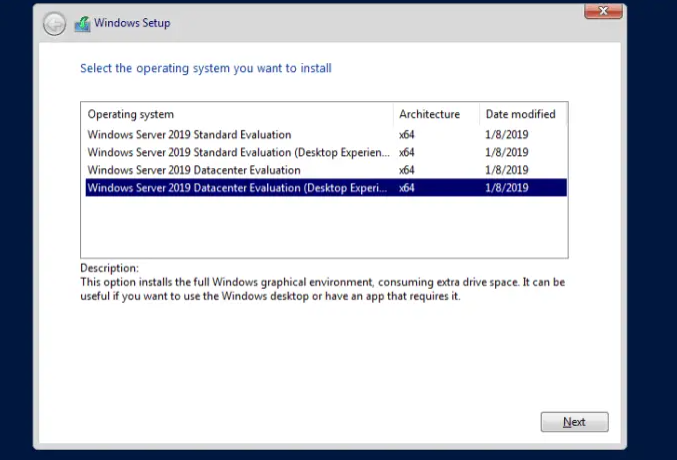
In the next window, choose the Windows Server 2019 Standard option to install the minimal edition that gives you the advantage of using the command-line and PowerShell tools to manage your Windows 2019 server.
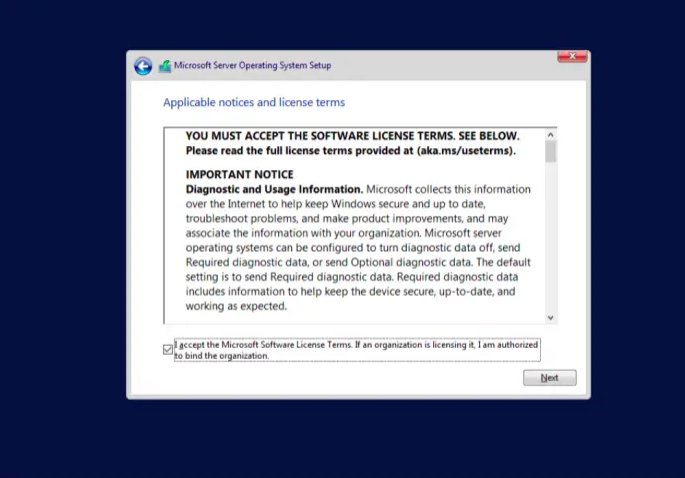
Next, read the License terms and agree to them to start the installation by checking the box “I accept the license terms“.
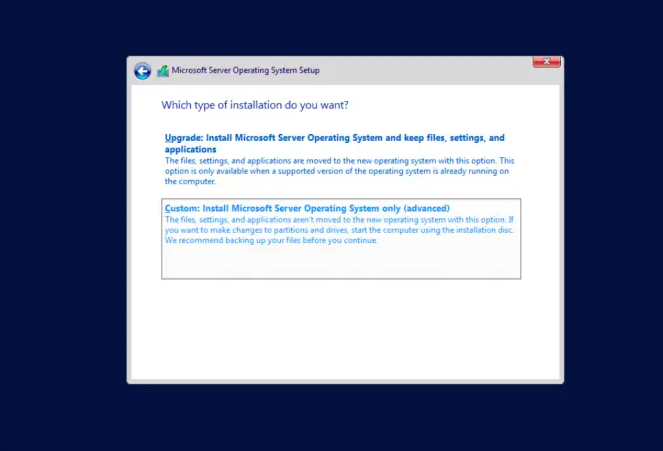
If you are installing Windows Server 2019 on a fresh server, select (Custom: Install Windows only).
Select a partition to install Windows Server, you can optionally create new one from available or use total available size by clicking “Next“.
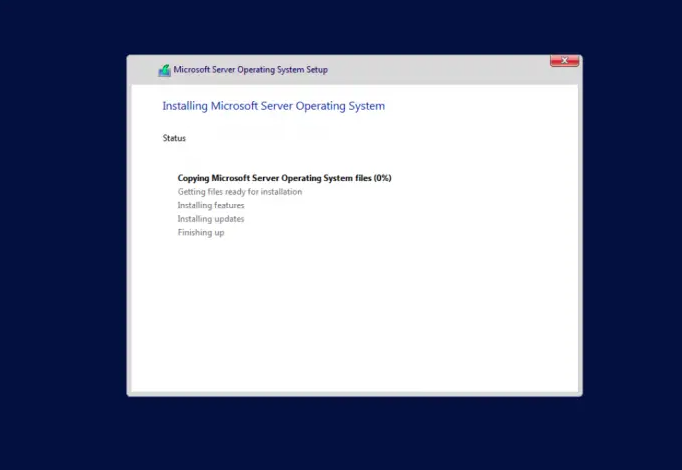
The installation process will start when you click “Next”
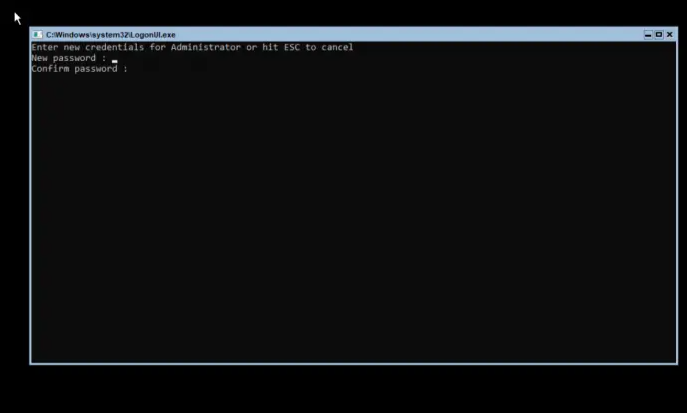
After a successful installation, the system should reboot and ask you to configure the Administrator password. Input the password and re-enter the password for verification:
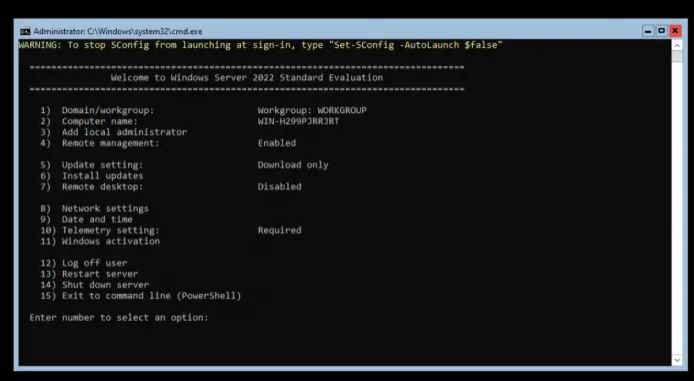
You will then be redirected to the PowerShell interface where you can begin managing your Windows server 2019 edition:
How to Activate Windows Server 2019 Standard
After installation, open Settings > Update & Security > Activation.
Click Change product key and enter the product key received in your email.
Follow the prompts to complete activation.
Note: If you are using Windows Server Datacenter Evaluation instead of the full version, you must convert it before activation.
Open Command Prompt or PowerShell as Administrator and run the following command:
dism.exe /online /set-edition:serverStandard/productkey:XXXXX-XXXXX-XXXXX-XXXXX-XXXXXX/AcceptEula

Replace the Xs with your actual product key
Get Your Genuine Windows Server 2019 Standard License Now!
Using an authentic license key guarantees security, reliability, and access to updates. We offer affordable, 100% genuine Windows Server 2019 Standard license keys with fast delivery and easy activation.
Buy Windows Server 2019 Standard License Here
Avoid counterfeit keys and protect your server investment by purchasing from trusted sources.